
Choose your wallpaper type
From box to wall
A new feeling.
One panel at a time.
The same step-by-step guide that arrives with your wallpaper, ready to follow at home.
Get everything ready
What you’ll need
Measure & cut
- Pencil
- Level
- Measuring tape
- Scissors
- Craft knife
Mix your adhesive
- Bucket for mixing adhesive
- Mixing stick or stirrer
Smooth & finish
- Wallpaper roller or smoothing spatula
- Seam roller
- Soft sponge or cloth
Steps 1–5
Prepare your space
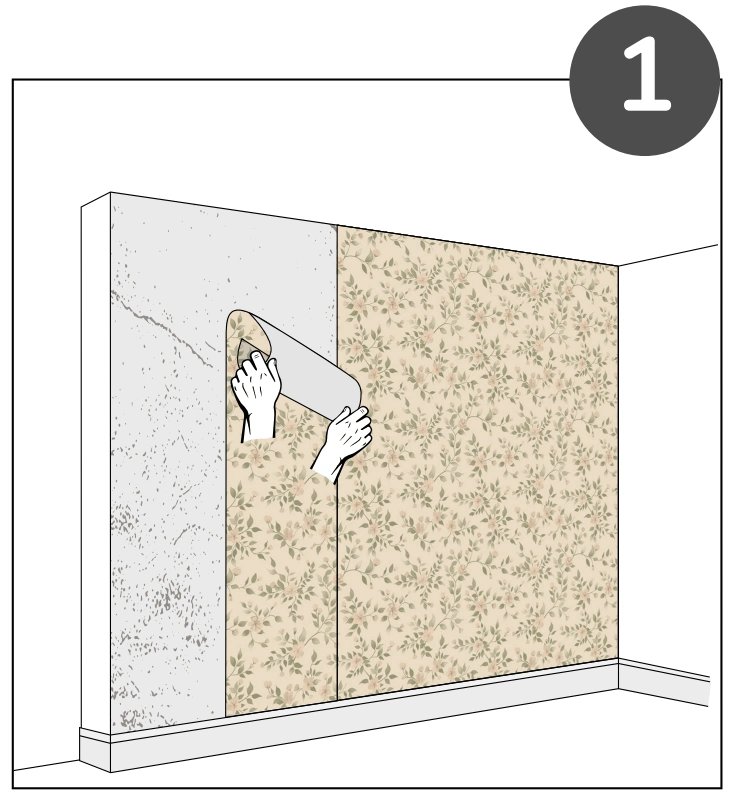
Step 1 of 14
Remove old coverings
Before applying your new wallpaper, remove any old wall coverings.
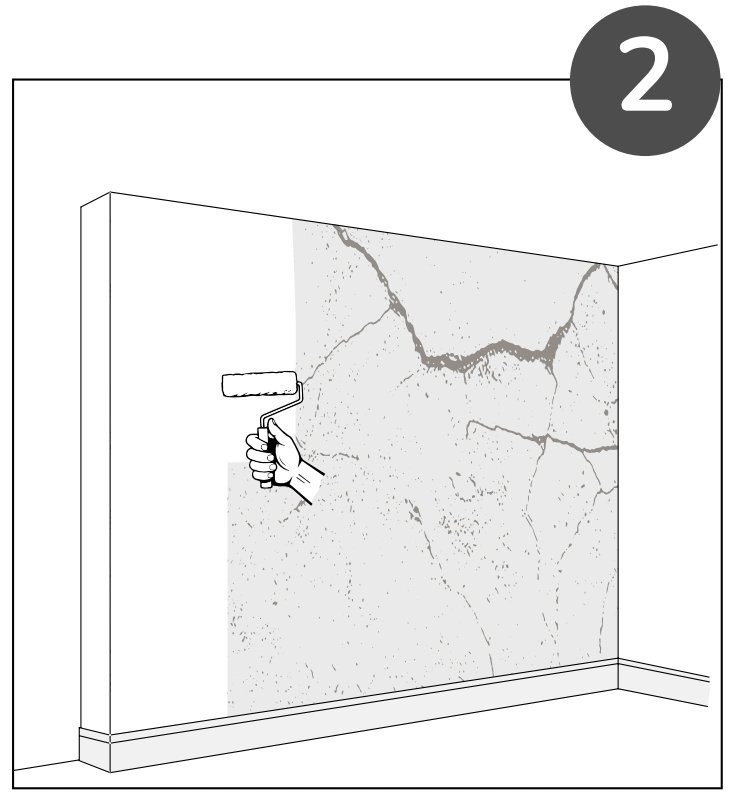
Step 2 of 14
Prepare your wall
Clean the wall with a soft cloth and a mild, non-abrasive cleaner. Fill uneven areas with putty and apply primer. Follow the manufacturer’s recommended drying time.
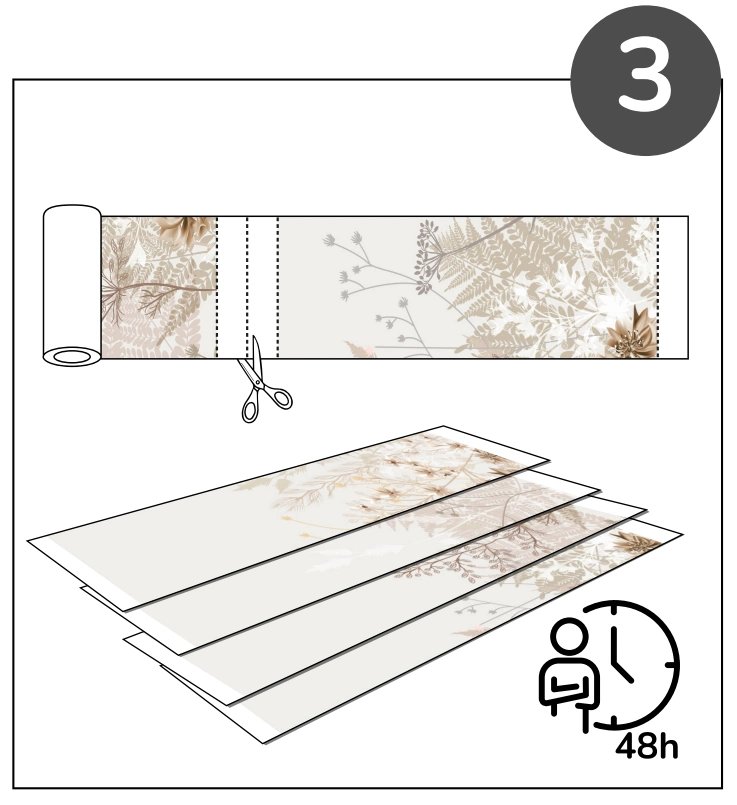
Step 3 of 14
Cut, then let it settle
Your wallpaper comes in one roll. Cut it into panels along the marked lines. Keep the service markings until after installation. The last panel is usually narrower: cut it lengthwise, leaving a small right-hand margin for alignment. After cutting, leave the panels in the room for 48 hours to acclimatise.
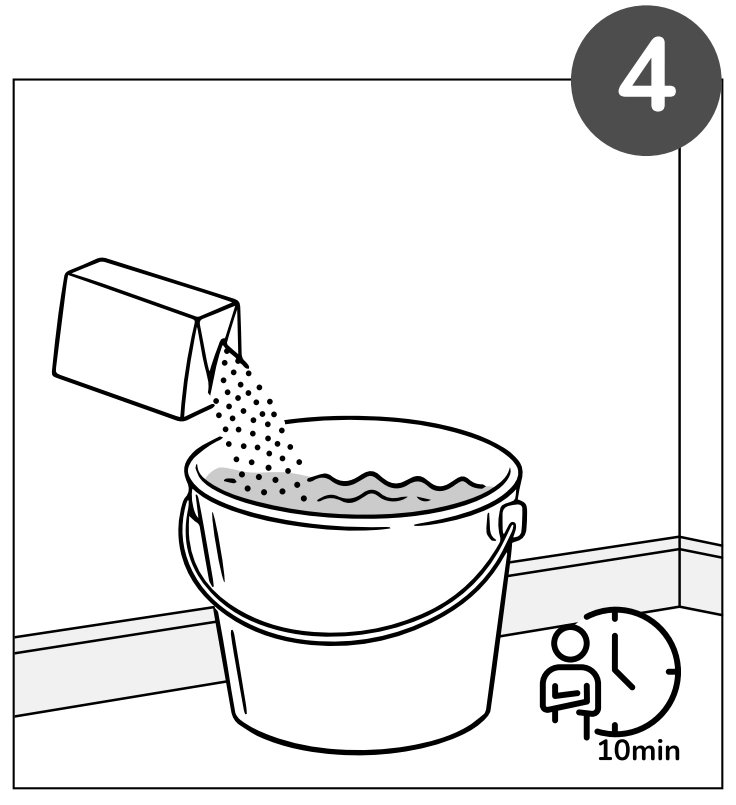
Step 4 of 14
Mix the adhesive
Fill a clean bucket with cold water, using the ratio shown on the adhesive packaging. Add the adhesive powder while stirring. Mix until smooth, then let it stand for 10 minutes before use.
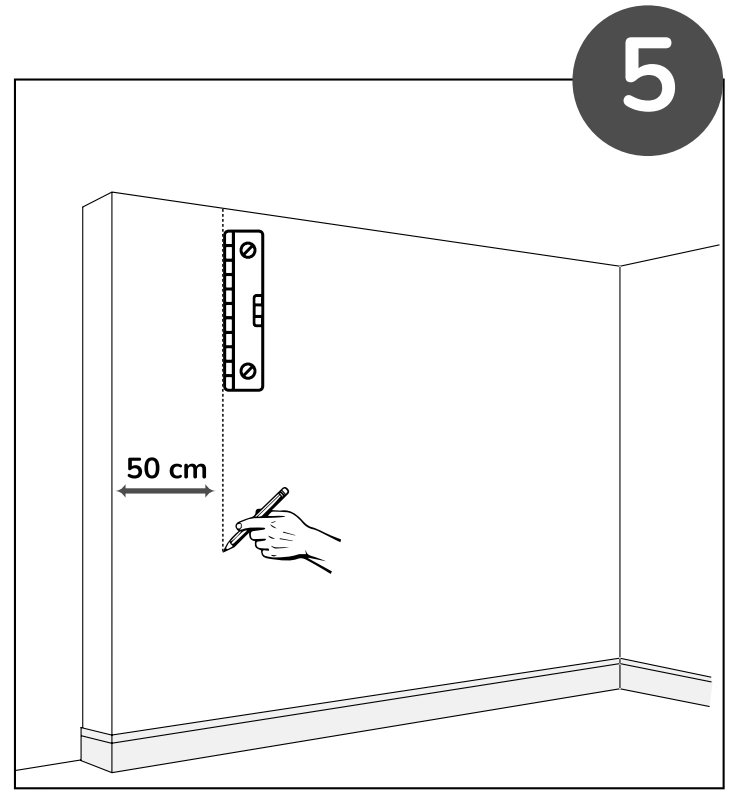
Step 5 of 14
Mark your starting line
Measure the width of your first panel. Mark the same distance from the left edge of the wall, then use a level to draw a vertical guide line. Keep the pencil mark light.


Steps 6–12
Bring your wall to life
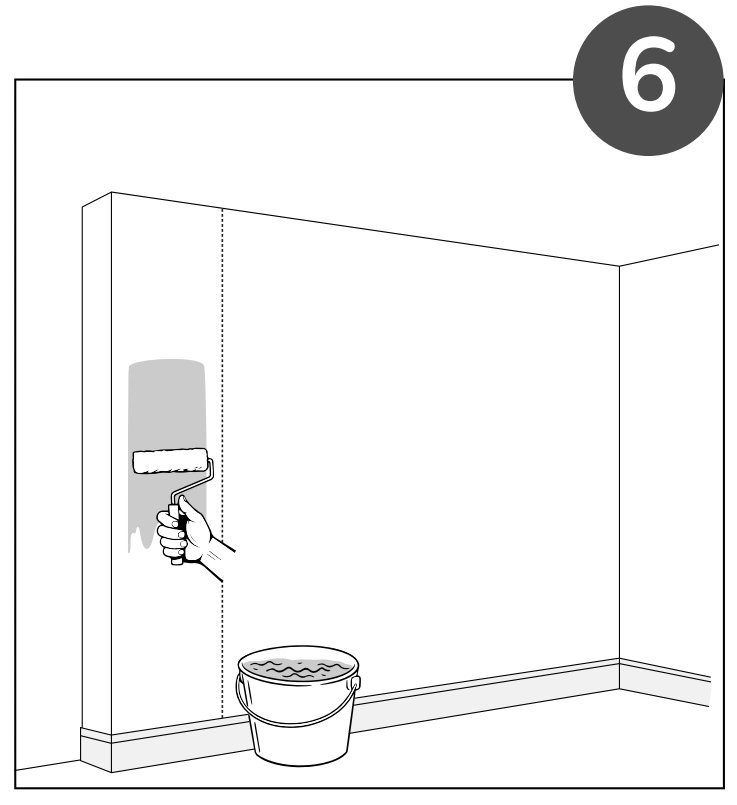
Step 6 of 14
Paste the wall
Apply glue directly to the wall, covering an area slightly wider than the first panel.
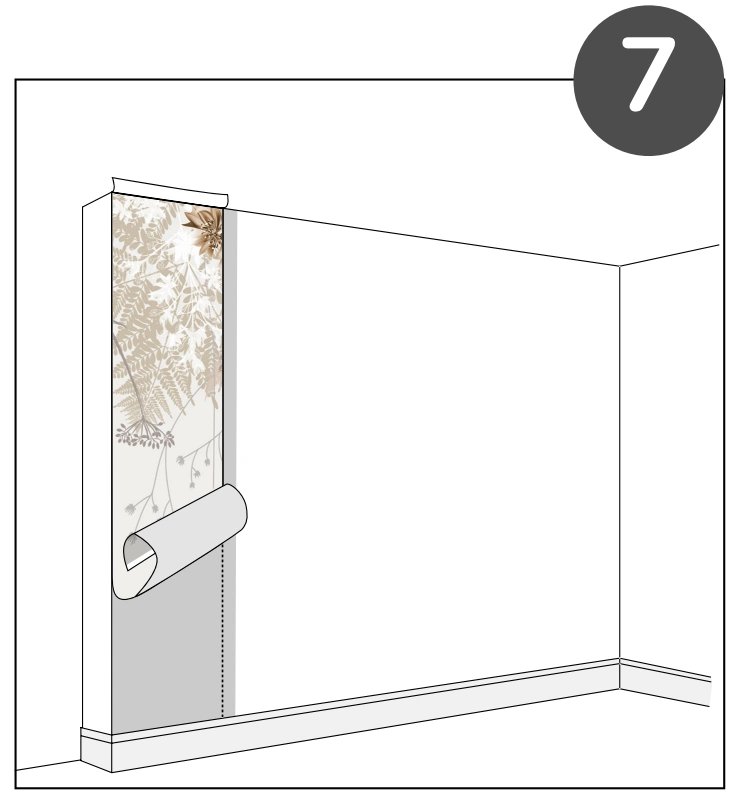
Step 7 of 14
Hang the first panel
Work from left to right, starting with panel 1. Align it with the vertical guide and press gently with a seam roller. Avoid getting glue on the front.
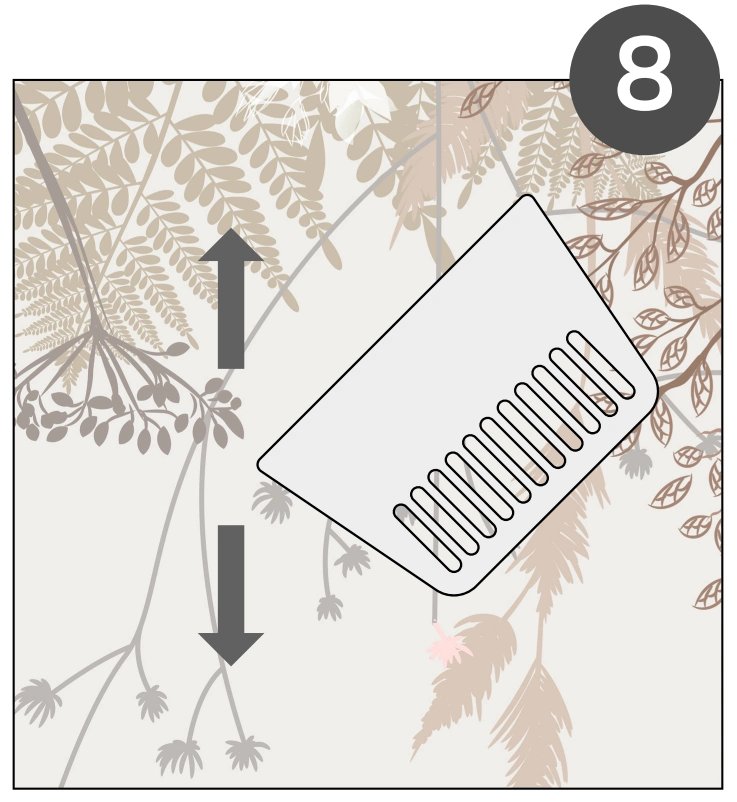
Step 8 of 14
Smooth it gently
Use a smoothing spatula or wallpaper roller, working from the centre outwards. Remove air bubbles with gentle strokes.
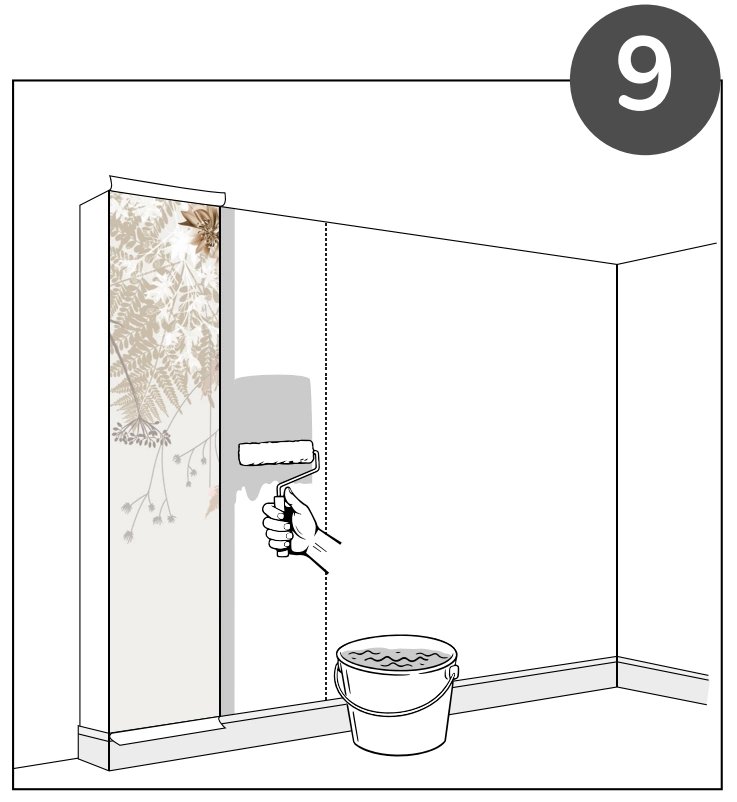
Step 9 of 14
Paste the next section
Apply glue directly to the wall, covering an area slightly wider than the next panel.
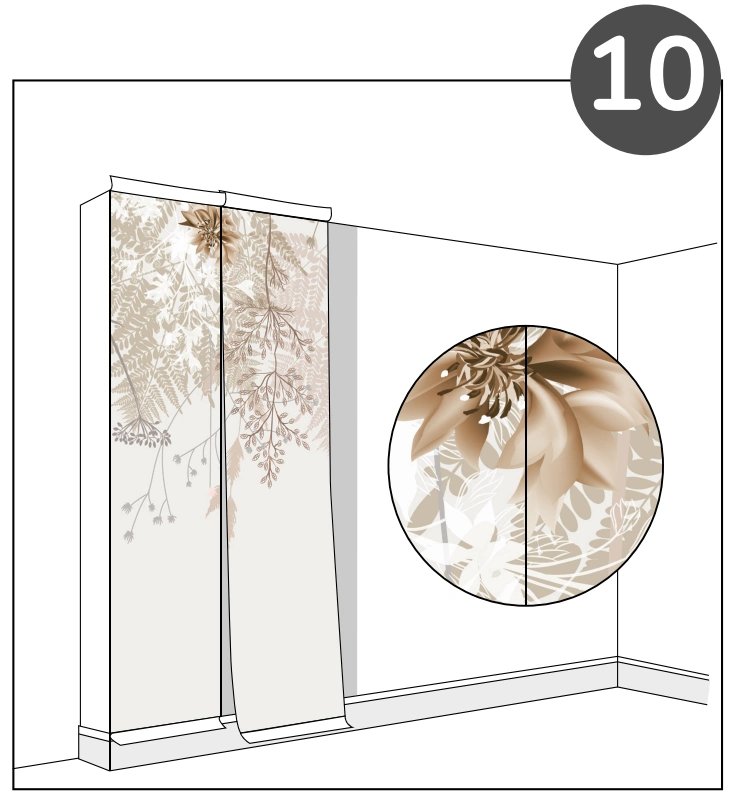
Step 10 of 14
Match the pattern
Apply the next panel edge to edge, without overlap, following the numbered order. Carefully align the pattern and press the seams gently with a seam roller or spatula.
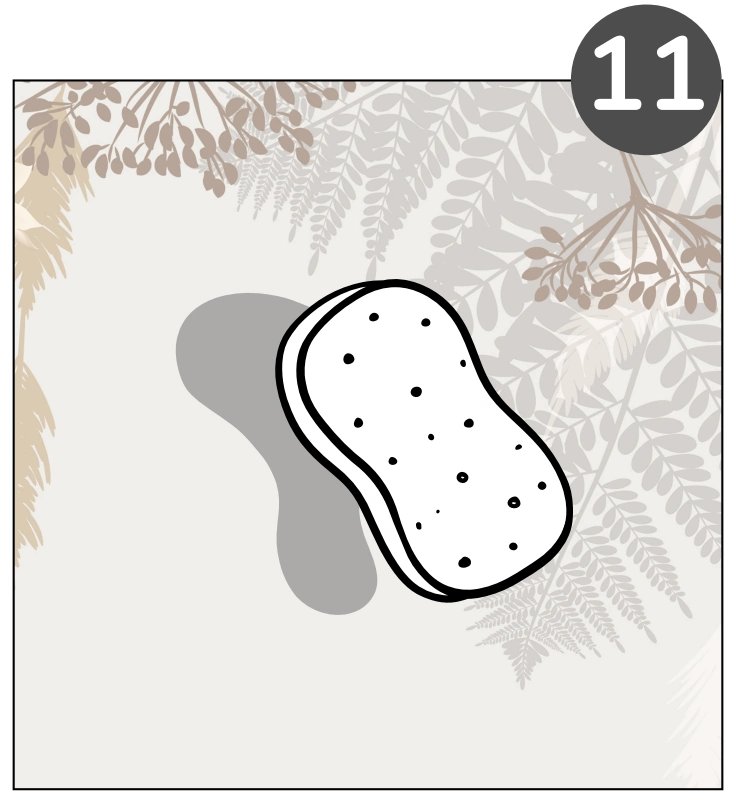
Step 11 of 14
Wipe away excess glue
Gently wipe off excess adhesive with a soft sponge or cloth. Avoid rubbing, which may damage the surface.
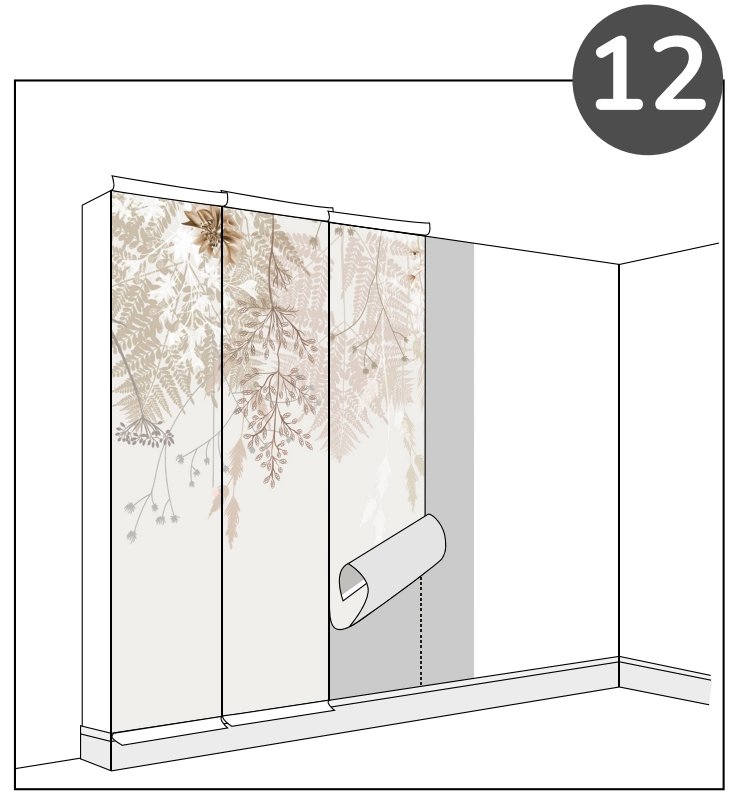
Step 12 of 14
Continue across your wall
Repeat steps 9–11 until all wallpaper panels are applied.


Steps 13–14
The finishing touch
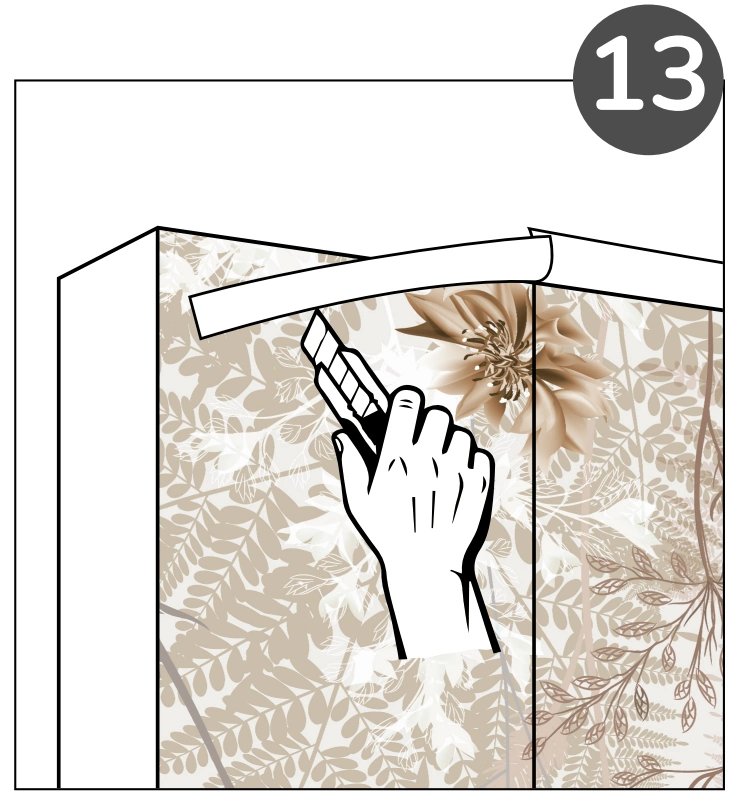
Step 13 of 14
Trim the edges
Trim excess wallpaper at the top and bottom with a craft knife.
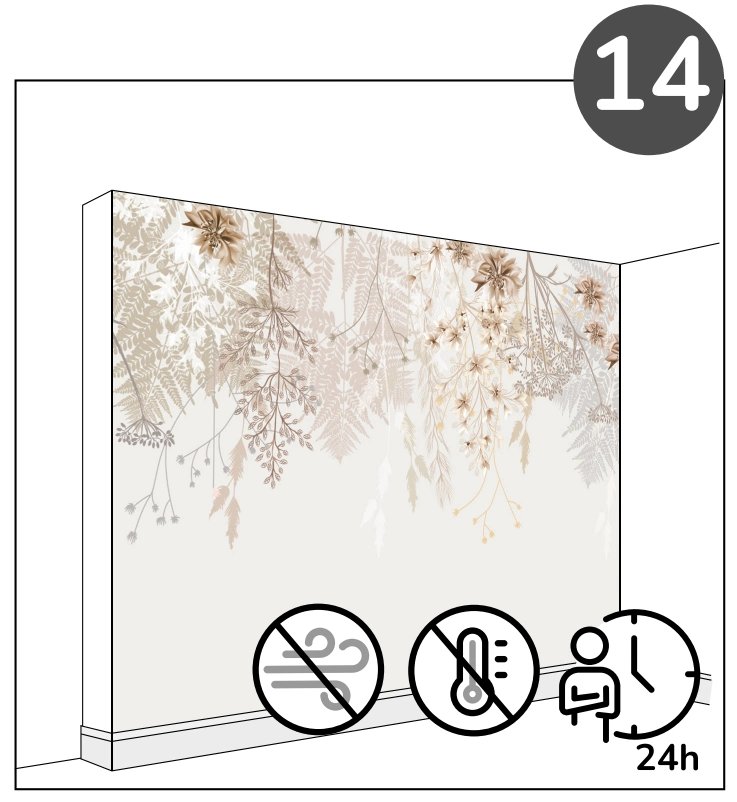
Step 14 of 14
Let your wall dry
Leave the wallpaper to dry for 24 hours. Avoid draughts and significant temperature changes during this time.


See the process
A little confidence
before you begin.
Watch the Tapeko installation demonstration alongside the steps above.

Installation footage by Tapeko
Get everything ready
What you’ll need
Measure & mark
- Spirit level
- Measuring tape or long ruler
- Pencil
Cut & trim
- Scissors
- Craft knife
- Straightedge
Smooth gently
- Plastic smoother or soft cloth
Steps 1–4
Prepare your space
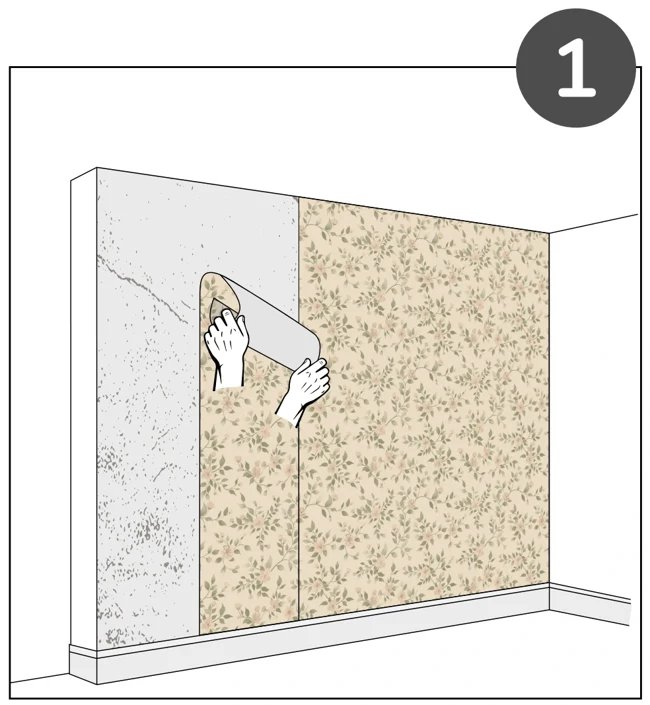
Step 1 of 10
Clear your wall
Completely remove old wallpaper, paint residue and other coverings. The surface must be clean and dry.
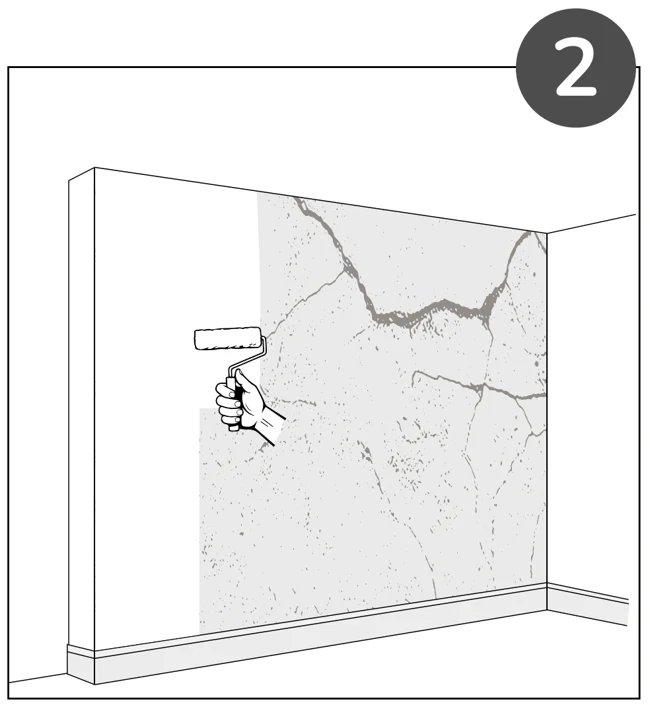
Step 2 of 10
Prepare the surface
Fill, sand and prime the wall so the self-adhesive layer sticks properly. If you skip these steps, at least clean the surface with a mild soapy solution to remove dust and dirt, then let it dry completely.
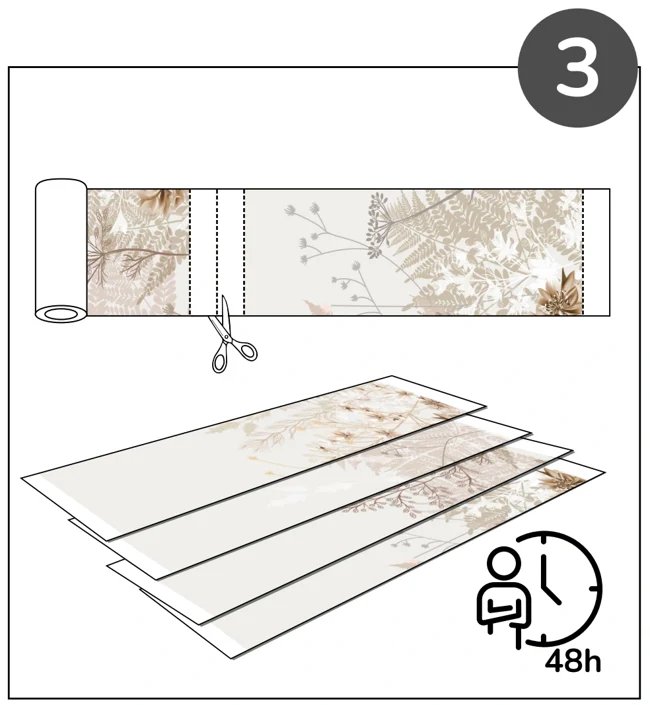
Step 3 of 10
Cut and acclimatise
Cut the roll into panels along the cutting lines. Lay them on the floor to check pattern alignment. Leave the wallpaper in the room for 48 hours to acclimatise and flatten.
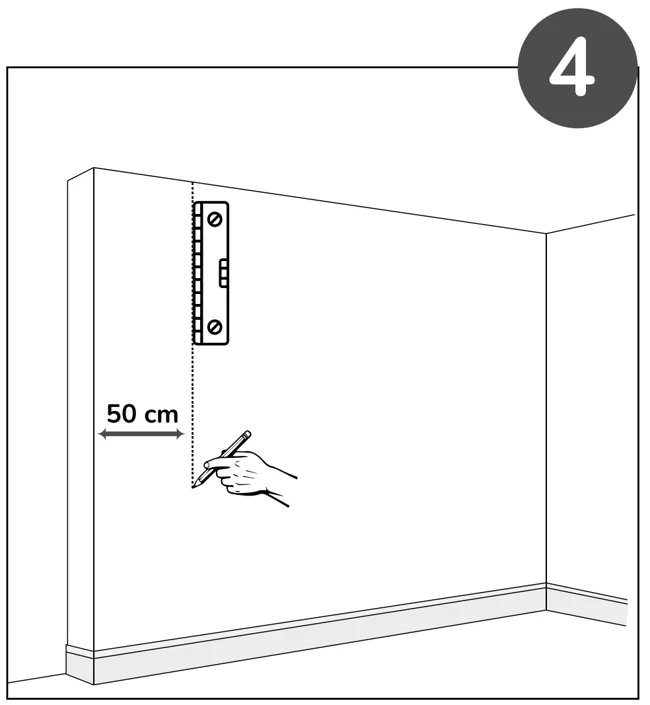
Step 4 of 10
Mark your starting line
Measure 50 cm, the width of the first panel, from the left corner. Use a level and pencil to draw a precise vertical line.


Steps 5–8
Bring your wall to life
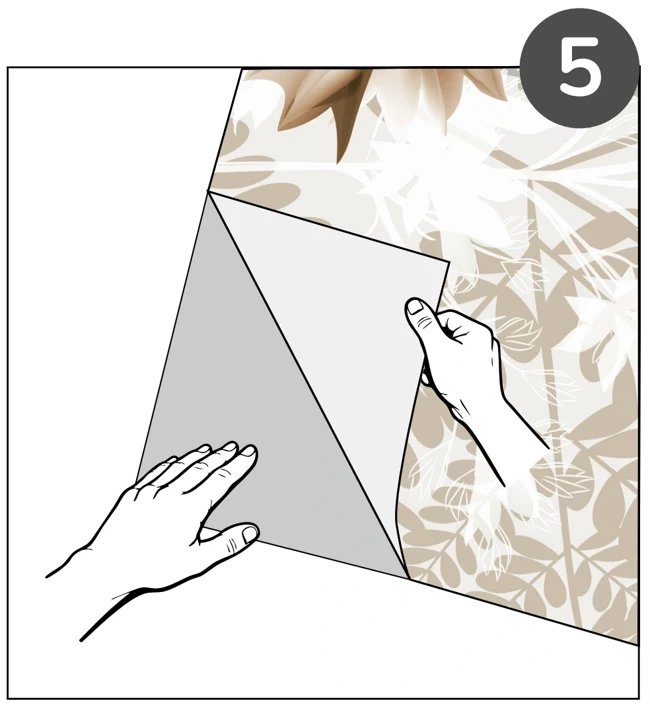
Step 5 of 10
Peel back the top
Take panel 1. Peel back approximately 30–50 cm of protective backing paper from the top edge.
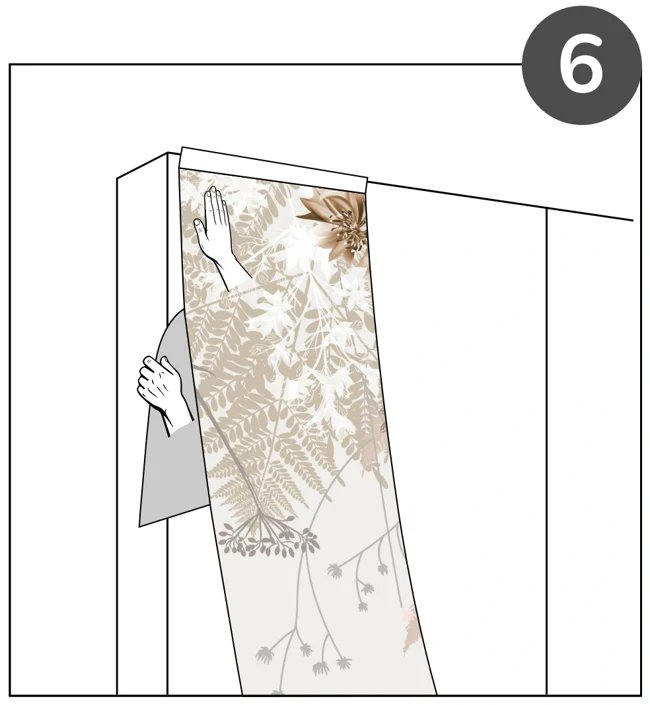
Step 6 of 10
Position the first panel
Place the top edge against the wall near the ceiling. Align the right edge of the panel precisely with your vertical guide line.
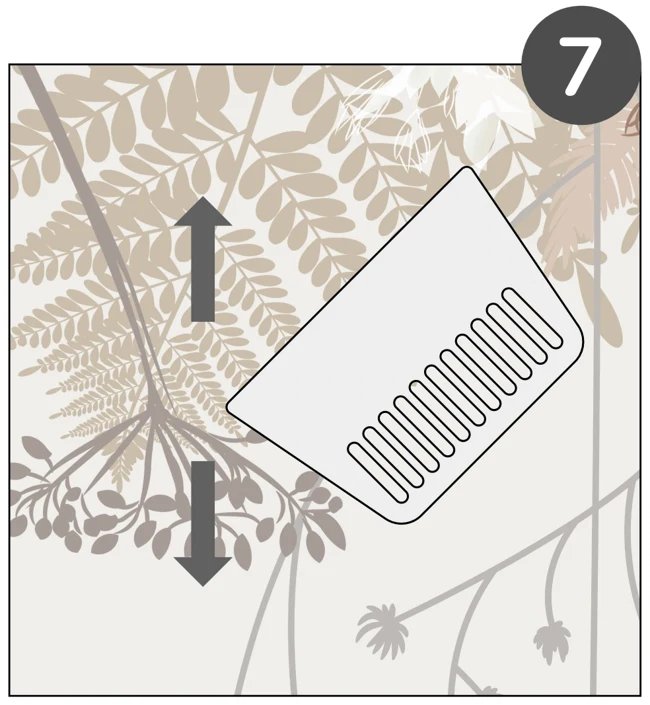
Step 7 of 10
Peel and smooth gently
Gradually remove the backing paper from top to bottom while smoothing from the centre outwards with a plastic smoother. Do not stretch the material: this can distort the pattern and cause gaps after the adhesive sets.
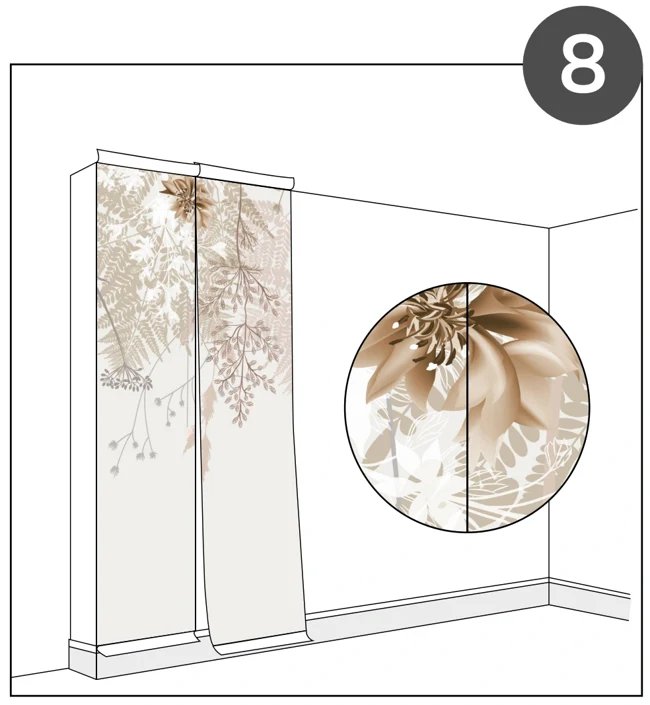
Step 8 of 10
Match the next panel
Apply the remaining panels in the same way, matching the pattern edge to edge, without overlap. Remember not to stretch the material.


Steps 9–10
The finishing touch
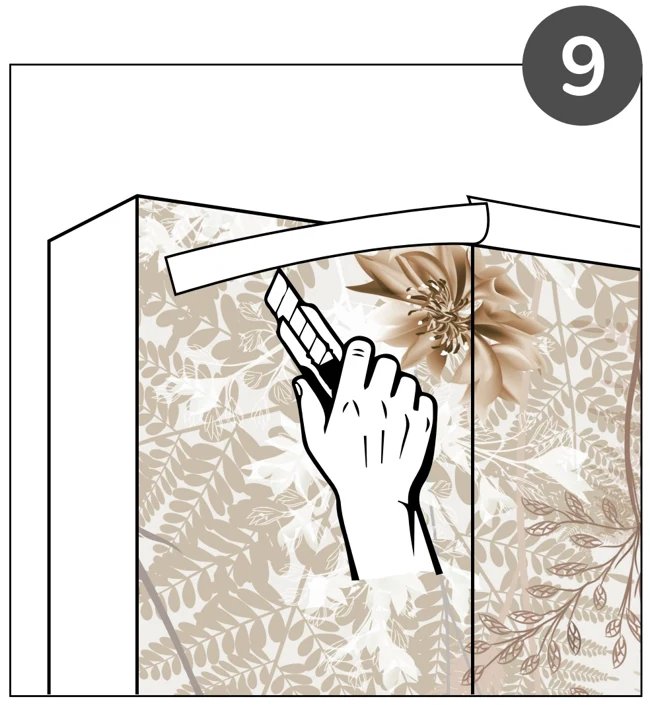
Step 9 of 10
Trim the edges
Once the panel is fixed, carefully trim excess material, including the numbered margins, at the top and bottom with a craft knife and a straightedge.
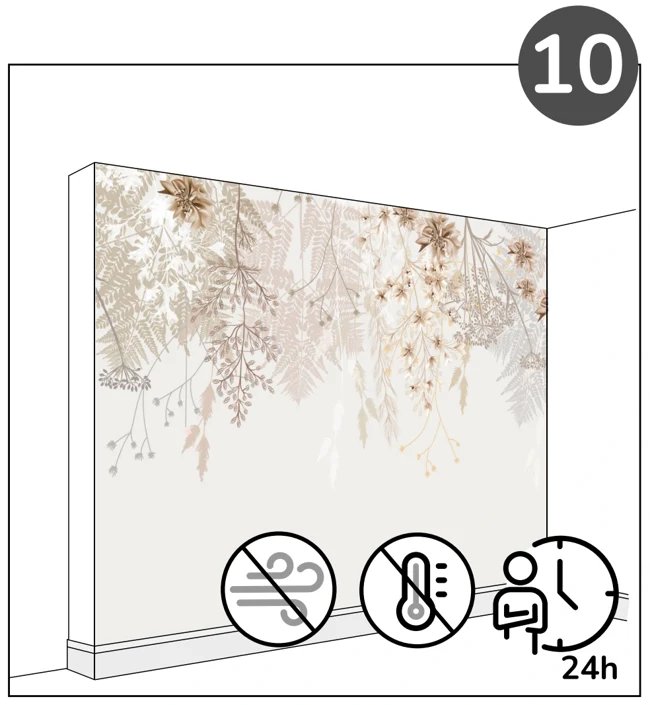
Step 10 of 10
Give it time to settle
For the first 24 hours, avoid draughts and maintain a stable room temperature so the adhesive bonds correctly.

